vSphere with Kubernetes Homelab Build
I’d been exploring Project Pacific during its beta in my homelab for a while. When vSphere 7 and NSX-T 3.0 went GA I took chance to rebuild lab and consolidate much of the configuration I’d been applying iteratively.

My lab hardware specification is a constraint so I’ve had to deviate from documentation in a few areas of configuration. During stand up and power up hosts experience CPU and RAM pressure but once everything is running in steady state it is tight but just fits.
Single VLAN / subnet Lab Network
My lab has a very simple physical network namely a single subnet (192.168.1.0/24) with DHCP enabled and which has default route to the internet.
| Host | Allocation |
|---|---|
| ad | 192.168.1.10 |
| esx1 | 192.168.1.11 |
| esx2 | 192.168.1.12 |
| esx3 | 192.168.1.13 |
| vcenter | 192.168.1.14 |
| nsx | 192.168.1.15 |
| edge | 192.168.1.16 |
| t0-uplink | 192.168.1.17 |
| tep-pool | 192.168.1.20-24 |
| workload control plane | 192.168.1.30-34 |
| Kubernetes Ingress | 192.168.1.48-63 |
| Kubernetes Egress | 192.168.1.64-79 |
| DHCP | 192.168.1.64-253 |
| Gateway | 192.168.1.254 |
I look to configure subnets on the NSX overlay network using the other RFC1918 private address range. The physical router does not support dynamic routing protocol so I configure static routes for these two CIDR with next hop as tier-0 uplink IP 192.168.1.17.
| CIDR | IP Range |
|---|---|
| 10.0.0.0/8 | 10.0.0.0 – 10.255.255.255 |
| 172.16.0.0/12 | 172.16.0.0 – 172.31.255.255 |
Compute Resource Nodes
Lab compute resources are provided by three Intel NUC6i5SYH hardware, each provides 2x 1.8Ghz CPU and 32GB RAM. I install ESXi boot partition on USB drives. To create a bootable USB for ESXi on macOS by creating a new VM in VMware Fusion with ESXi ISO attached as CD/DVD. It is only possible to connect USB to a running VM so power on VM and connect USB drive, work through ESXi installation via Fusion console.
At the end of installation message to disconnect the CD/DVD and reboot VM. I remain connected for reboot, using remote console navigate Troubleshoot menu to enable ESXi Shall and SSH, then configure networking to reflect homelab IP allocation.
Ensure unique System UUID and MAC address
Once ESXi has a basic network configuration I power down the VM and move USB to the Intel NUC and power on. During installation of ESXi the System UUID and MAC address are formed from the MAC address of the NIC. When using Fusion to create multiple ESXi VMs this scenario can lead to duplicatation of System UUID and MAC address. We can configure ESXi to move to physical NIC MAC address and form new ESXi System UUID by running commands like.
esxcli system settings advanced set -o /Net/FollowHardwareMac -i 1
sed -i 's#/system/uuid.*##' /etc/vmware/esx.conf
/sbin/auto-backup.sh
Add external USB NIC drivers
The Intel NUC has a single onboard 1GB NIC, I add an external USB NIC to each NUC. ESXi doesn’t ship with required drivers for these external USB NIC, for labs these are provides via VMware Flings. I copy the downloaded driver bundle to the /tmp folder on ESXi via an SFTP client like CyberDuck. Once the bundle is uploaded I following command to install the bundle.
esxcli software vib install -d /tmp/ESXi700-VMKUSB-NIC-FLING-34491022-component-15873236.zip
esxcli system maintenanceMode set --enable true
esxcli system shutdown reboot --reason "USB NIC driver"
Suppress Warnings
When booting ESXi from USB the system logs and coredumps can not persist to local storage. I also prefer to leave SSH enabled in lab so get warnings. Both of these choices gives me warnings which I prefer to suppress.
vim-cmd hostsvc/advopt/update UserVars.SuppressShellWarning long 1
vim-cmd hostsvc/advopt/update UserVars.SuppressCoredumpWarning long 1
vim-cmd hostsvc/advopt/update Syslog.global.logHost string 127.0.0.1
Form vSAN Cluster
Two of the Intel NUC I use each have SSD the third is used to provide compute resources only. The ESXi installation allows Management traffic only on VMkernel port so need to bind vSAN to VMkernel port. In my lab only two devices contribute disk to vSAN the default storage policy for will prevent any VM deployment. To configure this I run the following on each host in cluster.
esxcli system maintenanceMode set --enable false
esxcli vsan network ip add -i vmk0
esxcli vsan policy setdefault -c cluster -p "((\"hostFailuresToTolerate\" i0)"
esxcli vsan policy setdefault -c vdisk -p "((\"hostFailuresToTolerate\" i0)"
esxcli vsan policy setdefault -c vmnamespace -p "((\"hostFailuresToTolerate\" i0)"
esxcli vsan policy setdefault -c vmswap -p "((\"hostFailuresToTolerate\" i0) (\"forceProvisioning\" i1))"
esxcli vsan policy setdefault -c vmem -p "((\"hostFailuresToTolerate\" i0) (\"forceProvisioning\" i1))"
With the pre-requists in place a new vSAN cluster can be formed on first host using command like.
esxcli vsan cluster new
esxcli vsan cluster get | grep "Sub-Cluster UUID"
    Sub-Cluster UUID: 5291783f-77a6-c1dc-2ed8-6cfc200618b1
Add other nodes to the cluster using output of Sub-Cluster Master UUID using command like.
esxcli vsan cluster join -u 5291783f-77a6-c1dc-2ed8-6cfc200618b1
At this stage vSAN cluster while nodes are looking to form the quorum cannot be formed. Prior to vSAN 6.6 the cluster can discover members using multicast. Forming cluster without vCenter requires formation of unicast networking from the command line by manually building table kb2150303.
Active Directory
At this stage I upload Windows Server 2019 ISO to vSAN and use this to deploy a VM which acts as a environment Remote Desktop, File Store, DNS server, NTP source and Active Directory. Before proceeding create DNS A & PTR records for the environment.
vCenter Server
I use the Active Directory jump server to mount the vCenter ISO and use UI installer to deploy a ‘Tiny’ sized vCenter Server to existing Datastore. This creates a cluster with the move deployed to, at this stage I attach remaining hosts to cluster.
We can then pass ownership of vSAN cluster membership back to vCenter by running following on each host.
esxcfg-advcfg -s 0 /VSAN/IgnoreClusterMemberListupdates
The Workload Control Plane feature requires DRS and HA are required to be enabled on clusters it manages. Ensure these are enabled and HA admission control is disabled to maintain capacity.
Default vSAN Storage Policy
During the setup of VSAN cluster we configured the local policies to FTT=0 as I only have 2x hosts providing disk capacity. To deploy VMs and appliances via vCenter similarly need to adjust the ‘vSAN Default Storage Policy’ to ‘No data redundancy’.
NSX Installation
Deploy NSX-T 3.0 appliance sized Small, I need to remove CPU reservation to power on.
Connect NSX and vCenter
Connect to NSX appliance navigate to System > Fabric > Compute Managers and create bindng to vCenter. In order vCenter Workload Platform services can communicate with NSX ensure Enable Trust option is checked.
vSphere Distributed Switch
Prior to release of vSphere 7 and NSX-T 3.0 to install NSX required the creation of a N-VDS host switch on each ESXi host. While segments created on N-VDS where visible in vSphere they were not as rich as VDS. It is a constraint that physical NIC uplinks cannot be assigned to both a VDS and N-VDS.
It was possible to have hosts with two pNIC which initially get built as VDS and then migrate to N-VDS and remove VDS. When running only with N-VDS the segments show in vCenter as Opaque networks. Not many 3rd party products support Opaque networks, automation became more complex as the network could not be correctly gathered via vCenter. Many production deployments moved to hosts with four pNIC two assigned to N-VDS and two assigned to VDS to hold the VMkernel ports.
With these latest product versions the VDS and N-VDS capabilities converge to singluar VDS construct for use as host switch on ESXi the N-VDS remains for Edge and non-ESXi Transport Node types. The converged VDS for ESXi improves pNIC design and also makes operational management much easier as there is a singluar place for configuring NIOC, MTU and LLDP configuration.
The lab hosts have two pNIC I leave onboard to vSphere Standard Switch with VMkernel ports attached. I create a VDS Version 7 configured with 1 uplink, NIOS enabled but without default port group. The default VDS is created with MTU 1500, to support NSX I increase this to Advanced configuration option for MTU 1700.
Once VDS is created I add usb0 NIC from all cluster hosts to be assigned to Uplink1. I do not migrate VMkernel or VM networking to VDS.
Create a Tunnel Endpoint IP Address Pool
System > Networking > IP Management > IP Address Pools > Add IP Address Pool
Name:             tep-pool
IP Range:         192.168.1.20-192.168.1.24
CIDR:             192.168.1.0/24
Gateway IP:       192.168.1.254
DNS Server:       192.168.1.10
DNS Suffix:       darrylcauldwell.com
Configure ESXi hosts as Transport Nodes
To consistently configure ESXi hosts as NSX Transport Nodes I create a Transport Node Profile.
Name                           Host Transport Node Profile
Host Switch - Type             VDS
Host Switch - Mode             Standard
Host Switch - Name             vCenter \ DSwitch
Host Switch - Transport Zone   nsx-overlay-transportzone & nsx-vlan-transportzone
Host Switch - Uplink Profile   nsx-default-uplink-hostswitch-profile
Host Switch - IP Assignment    IP Pool - tep-pool
Host Switch - Teaming Policy   uplink1 (active)= Uplink 1
Once created using Host Transport Nodes menu select cluster and apply profile. Once completed it is possible to view the NSX components installed on all ESXi hosts using:
esxcli software vib list | grep nsx
Configure NSX Edge
The NSX Edge provides a Layer 3 routing capability the NSX Container Plugin requires at least a medium sized Edge to deploy a small loadbalancer.
Deploy a medium sized Edge node
System > Fabric > Nodes > Edge Transport Nodes > Add Edge VM
Name:                   nsxEdge
FQDN:                   edge
Size:                   Large
Shares:                 Normal
Memory Reservation:     0
IP Assignment:          Static
Management Interface:   VM Network
Node Switch
Name:                       nvds1
Transport Zone:             nsx-overlay-transportzone
Uplink Profile:             nsx-edge-single-nic-uplink-profile
IP Pool:                    tep-pool
DPDK Fastpath Interfaces:   VM Network

Name:                       nvds2
Transport Zone:             nsx-vlan-transportzone
Uplink Profile:             nsx-edge-single-nic-uplink-profile
DPDK Fastpath Interfaces:   VM Network
Configure Edge Cluster
When Edge has fully deployed create Edge Cluster
System > Fabric > Nodes > Edge Clusters > Add
Name:                       edgeCluster
Transport Nodes:            nsxEdge
Uplink Network Segment
A network segment is required to to connect Tier0 router uplink to VLAN
Networking > Segments > Add Segment
Segment Name:               edgeUplink
Connectivity:               None
Transport Zone:             nsx-vlan-transportzone
VLAN:                       0
Multicast:                  Disabled
Tier0 Router
A logical router is required I create one like:
Networking > Tier-0 Gateways > Add Gateway > Tier0
Name:                       tier0
HA Mode:                    Active-Standby
Failover:                   non preemptive
Edge Cluster:               edgeCluster
Add Interface
Name:                       tier0uplink
Type:                       External
IP Address:                 192.168.1.17/24
Connected To:               edgeUplink
Edge Node:                  nsxEdge
Once interface is added you can test it works as it will now be able to ping.
ping 192.168.1.17 -c 1
Enable a cluster as Workload Control Plane (WCP)
With all of the pre-requists in place we can now use wizard to enable integrated Kubernetes.
[EDIT 4th May] since initial publication I found another blog post around deploying minimal lab. By default when enabling Workload Control Plane this deploys a 3x VMs which form the Kubernetes supervisor cluster. This can be reduced to 2x by updating /etc/vmware/wcp/wcpsvc.yaml on the VCSA and changing the minmasters and maxmasters properties from 3 to 2. Then restarting the wcp service service-control --restart wcp
Menu > Workload Management > Enable
- Select a Cluster
If cluster does not show available check reason via GUI and or these vCenter logs for clues.
/var/log/vmware/wcp/wcpsvc.log
/var/log/vmware/wcp/nsxd.log
- Cluster Settings
Cluster Size: Tiny
- Network
The management network refers to the control plane needs to communicate with vCenter and NSX. The workload network will come from the RFC1918 addressable space. Enter network details
Workload Control Plane Networking
Network:                        VM Network
Starting IP Address:            192.168.1.30
Subnet Mask:                    255.255.255.0
Gateway:                        192.168.1.254
DNS Server:                     192.168.1.10
NTP Server:                     192.168.1.10
DNS Search Domains:             darrylcauldwell.com
Workload Network
vDS:                            DSwitch
Edge Cluster:                   edgeCluster
DNS Server:                     192.168.1.10
Pod CIDRs:                      10.244.0.0/21 (default)
Service CIDRS:                  10.96.0.0/24 (default)
Ingress CIDR:                   192.168.1.48/28
Egress CIDR:                    192.168.1.64/28
- Configure storage to use
Control Plane Node              vSAN Default Storage Policy
Ephemeral Disks                 vSAN Default Storage Policy
Image Cache                     vSAN Default Storage Policy
- Review and confirm
Once submitted we see in vCenter a resource pool named Namespaces and three virtual appliances named WcpAPIServerAgent each is allocated 2CPU and 8GB RAM. An installation occurs on the three virtual appliances which, these attempt to run before appliances deploy it is normal to see install failures during this phase.
The progress messages available via UI aren’t superb its useful to SSH to VCSA and tail the log:
tail -f /var/log/vmware/wcp/wcpsvc.logtail -f /var/log/vmware/wcp/wcpsvc.log
If all has goes to plan an hour and a half or so later and if all gone to plan.
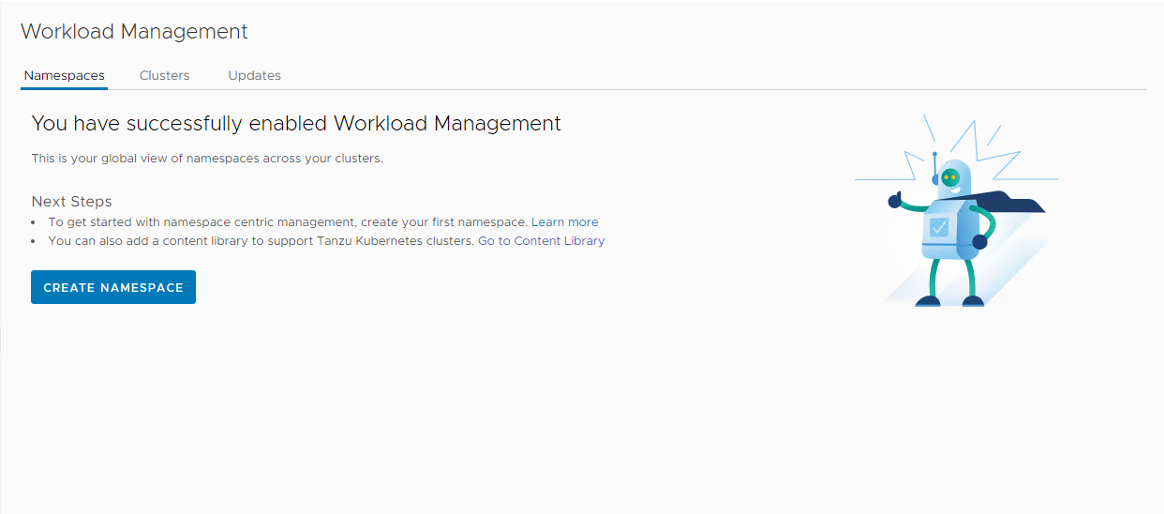
From here I can begin to create and consume native Kubernetes namespaces and resources.