OpenStack Windows Image
While looking at OpenStack as the control plane for vSphere it appears there isn’t too much detail and I found it tricky to create my first OpenStack image. Here are the steps I followed.
Create vSphere Donor Windows Virtual Machine
- Use vSphere web client wizard to create new hardware v10 virtual machine in vSphere with Thin vHDD
- Attach Windows DVD ISO
- Install Windows to virtual machine
- Disconnect DVD ISO
- Install VMware Tools
- Complete VMware Tools Reboot
- Power Down VM
- Export VM as OVF
Create OpenStack Image
- Open OpenStack Console
- Change to your Project in left pane
- Select Manage Compute, Images and Snapshots
- Click Create Image
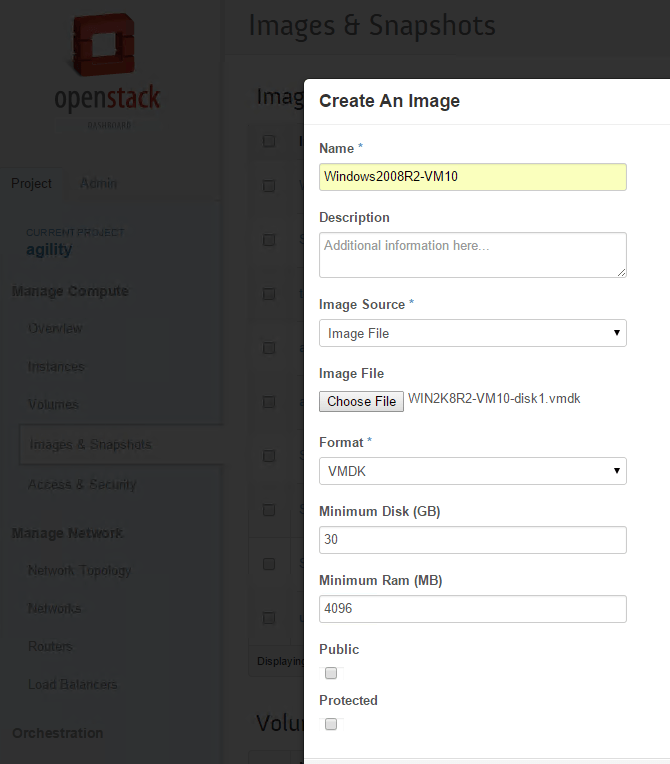
- Complete form using this as an example, for Image File, open the OVF file and select the VMDK you exported earlier

- Click Create Image
- Wait while file uploads, it takes a while, you’ll be returned to console when it completes
Note: this updates the file to folder glance_openstack on the datastore glance is configured to use. Once created you can cross ref the file UID with the OpenStack Console.
Test OpenStack Image Works As Instance
- Open OpenStack Console
- Change to your Project in left pane
- Select Manage Compute Instances
- Click Launch Instance in right pane
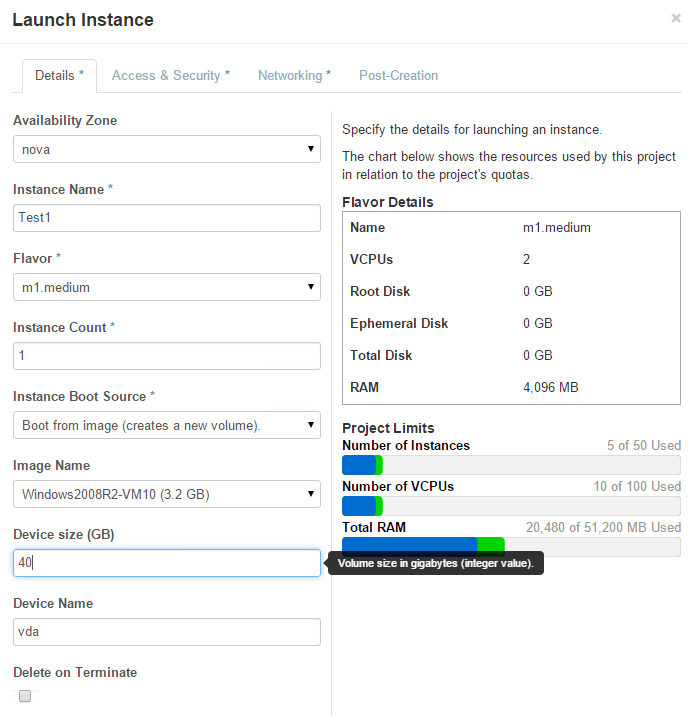
- Complete Details Form

- Ensure correct Security Group selected on Access and Security Tab
- Ensure correct Network is selected on Networking tab
- Click Launch
VSAN Abnormality
If your Image is to go to a VSAN datastore and your using OpenStack Havana the above method will fail, this is because VSAN introduces a new disk type [streamOptimized] (http://specs.openstack.org/openstack/nova-specs/specs/kilo/approved/vmware-vsan-support.html) which the UI is not aware of (this is fixed in Icehouse and later).
In order to import these images you would need to use the OpenStack command line interface. First open WebUI then “Project -> Manage Compute -> Access & Security” and click Download OpenStack RC File.
SCP the RC file to your Linux jump box /var/tmp and then use
source /var/tmp/<filename>.rc
Enter password when prompted.
Once you have authenticated, run script like (substituting name and filename as required.
glance --insecure --os-endpoint-type internalURL image-create \
--name Windows2008R2-VM10 \
--property vmware_disktype=streamOptimized \
--property vmware_adaptertype=lsiLogic \
--container-format=bare --disk-format=vmdk \
--is-public=True \
--file=/var/tmp/Windows2008R2-VM10-disk1.vmdk</code>
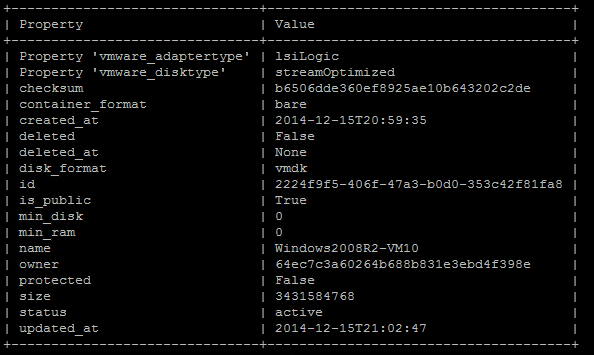
You should get output like

If you have uploaded an image already and found that its not streamOptimized you can change the attribute.
glance image-update <image_name or uuid> --property vmware_disktype=streamOptimized