Raspberry Pi Cluster Hardware
I have worked most of my professional life with systems built with Intel x86, x64 and ia64 chips. Intel processors use Complex Instruction Set Computing while Arm uses Reduced Instruction Set Computing. Processors with CISC architecture look to move complexity to hardware to simlify code, so small code sizes with high cycles per second. Processors with RISC architecture invert the relationship larger code size with low cycles per second.
Anyone who has worked in a data center has an awareness of importance of the amount of heat generated by Intel powered servers. There isn’t much heat generated from allowing electricity to flow through something (unless there is A LOT of electricity). All of Arm’s designs are energy efficient which is why they have become popular for running in smartphones, tablets and other embedded devices. If Arm processors can get traction used in servers this can only be good news for data center electricity usage.
I enjoy learning by doing and to begin to better understand Arm looked to build a cluster of Raspberry Pi. My goals of cluster include:
- Understanding more about Raspberry Pi hardware
- Understanding how an distributed application might work across physical hosts using MPI. MPI is a programming model that is widely used for parallel programming in a cluster.
- Understanding how micro-servies application may work in Edge locations running Kubernetes on low-cost hardware.
- Understanding how ESXi on Arm development is progressing
Project repository: https://github.com/darrylcauldwell/piCluster
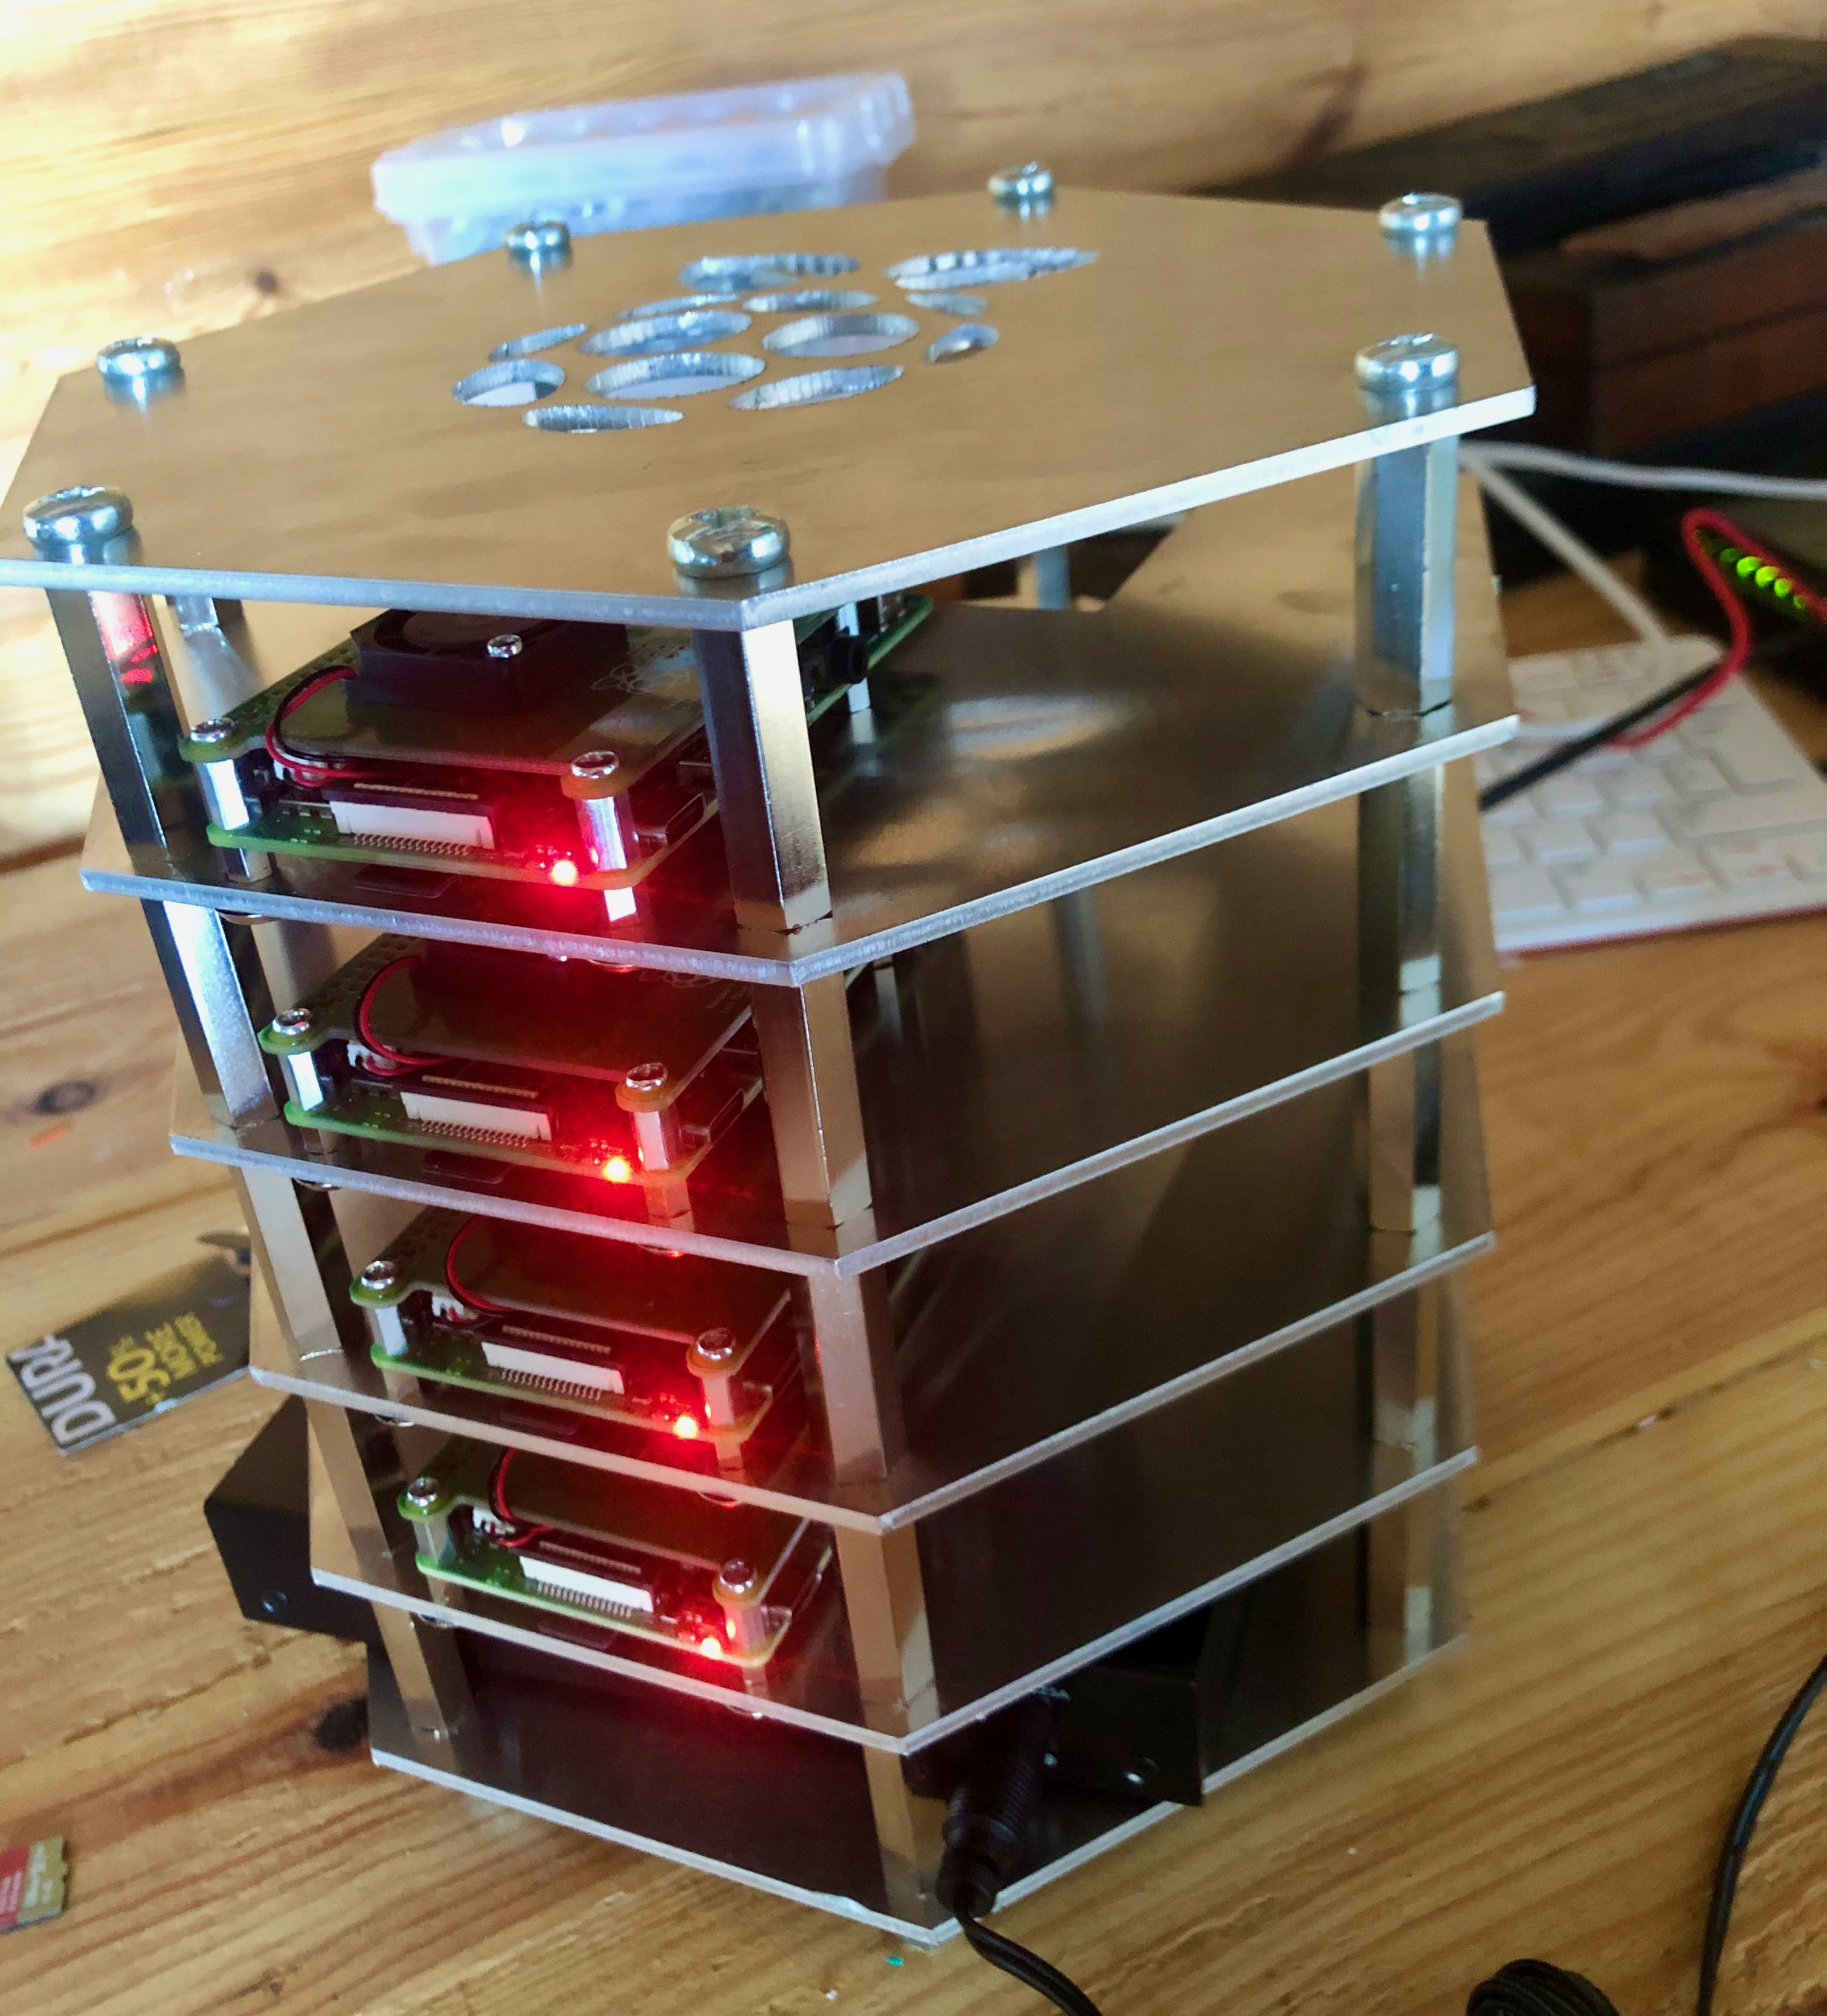
Pi Cluster Rack Hardware
Power over Ethernet
One of my goals for the cluster was the hardware self-contained and easy to connect to network and power. Out of the box the Raspberry Pi 4b is powered over USB-C and operates at 5.1V upto 3A so has maximum draw (5.1*3=) 15.3watt. While I could use one official Raspberry Pi USB-C 15.3watt power supply for each this would require four power sockets. A cleaner cabling solution is to equip each Pi 4b with a PoE HAT and power each using a Power over Ethernet–enabled network. When the Pi is cabled to a PoE network switch port the power gets routed to four PoE pins on the Pi board. The PoE switch ports deliver between 27-57volts. The PoE HAT connects to the four PoE pins and has onboard transformer which converts input voltage to 5volt and then routes this to the GPIO power pins.
Network Switch
For selecting the PoE network switch there are two important factors I considered. PoE has two specifications the initial 802.3af (upto 15watt) and revised 802.3at (upto 30watt), the Pi 4b has 15.3watt maximum draw so ports supporting 802.3af. Another important factor to consider is maximum draw across all PoE ports here our maximum draw would be (15.3*4=) 61.2watts. The Netgear GS305P has five ports with four supported for 802.3af or 802.3at and is rated for 63W power draw, it is also compact with dimensions 158 x 101 x 29 mm.
Storage
For storage selection the SanDisk Extreme offers sequential read up to 160MB/sec and sequential write up to 90MB/sec. The SanDisk Ultra offers sequential read up to 100MB/sec and sequential write up to 90MB/sec. The Pi4B has a dedicated SD card socket which suports 1.8V, DDR50 mode (at a peak bandwidth of 50 Megabytes / sec). The Pi 4h as a USB 3 interface which has peak bandwidth 620 Megabytes / sec. The Arcanite 128GB USB 3.1 Flash Drive has a small formfactor and low cost and offers read speeds up to 400 MB/s and write speeds up to 100 MB/s.
Mounting Rack
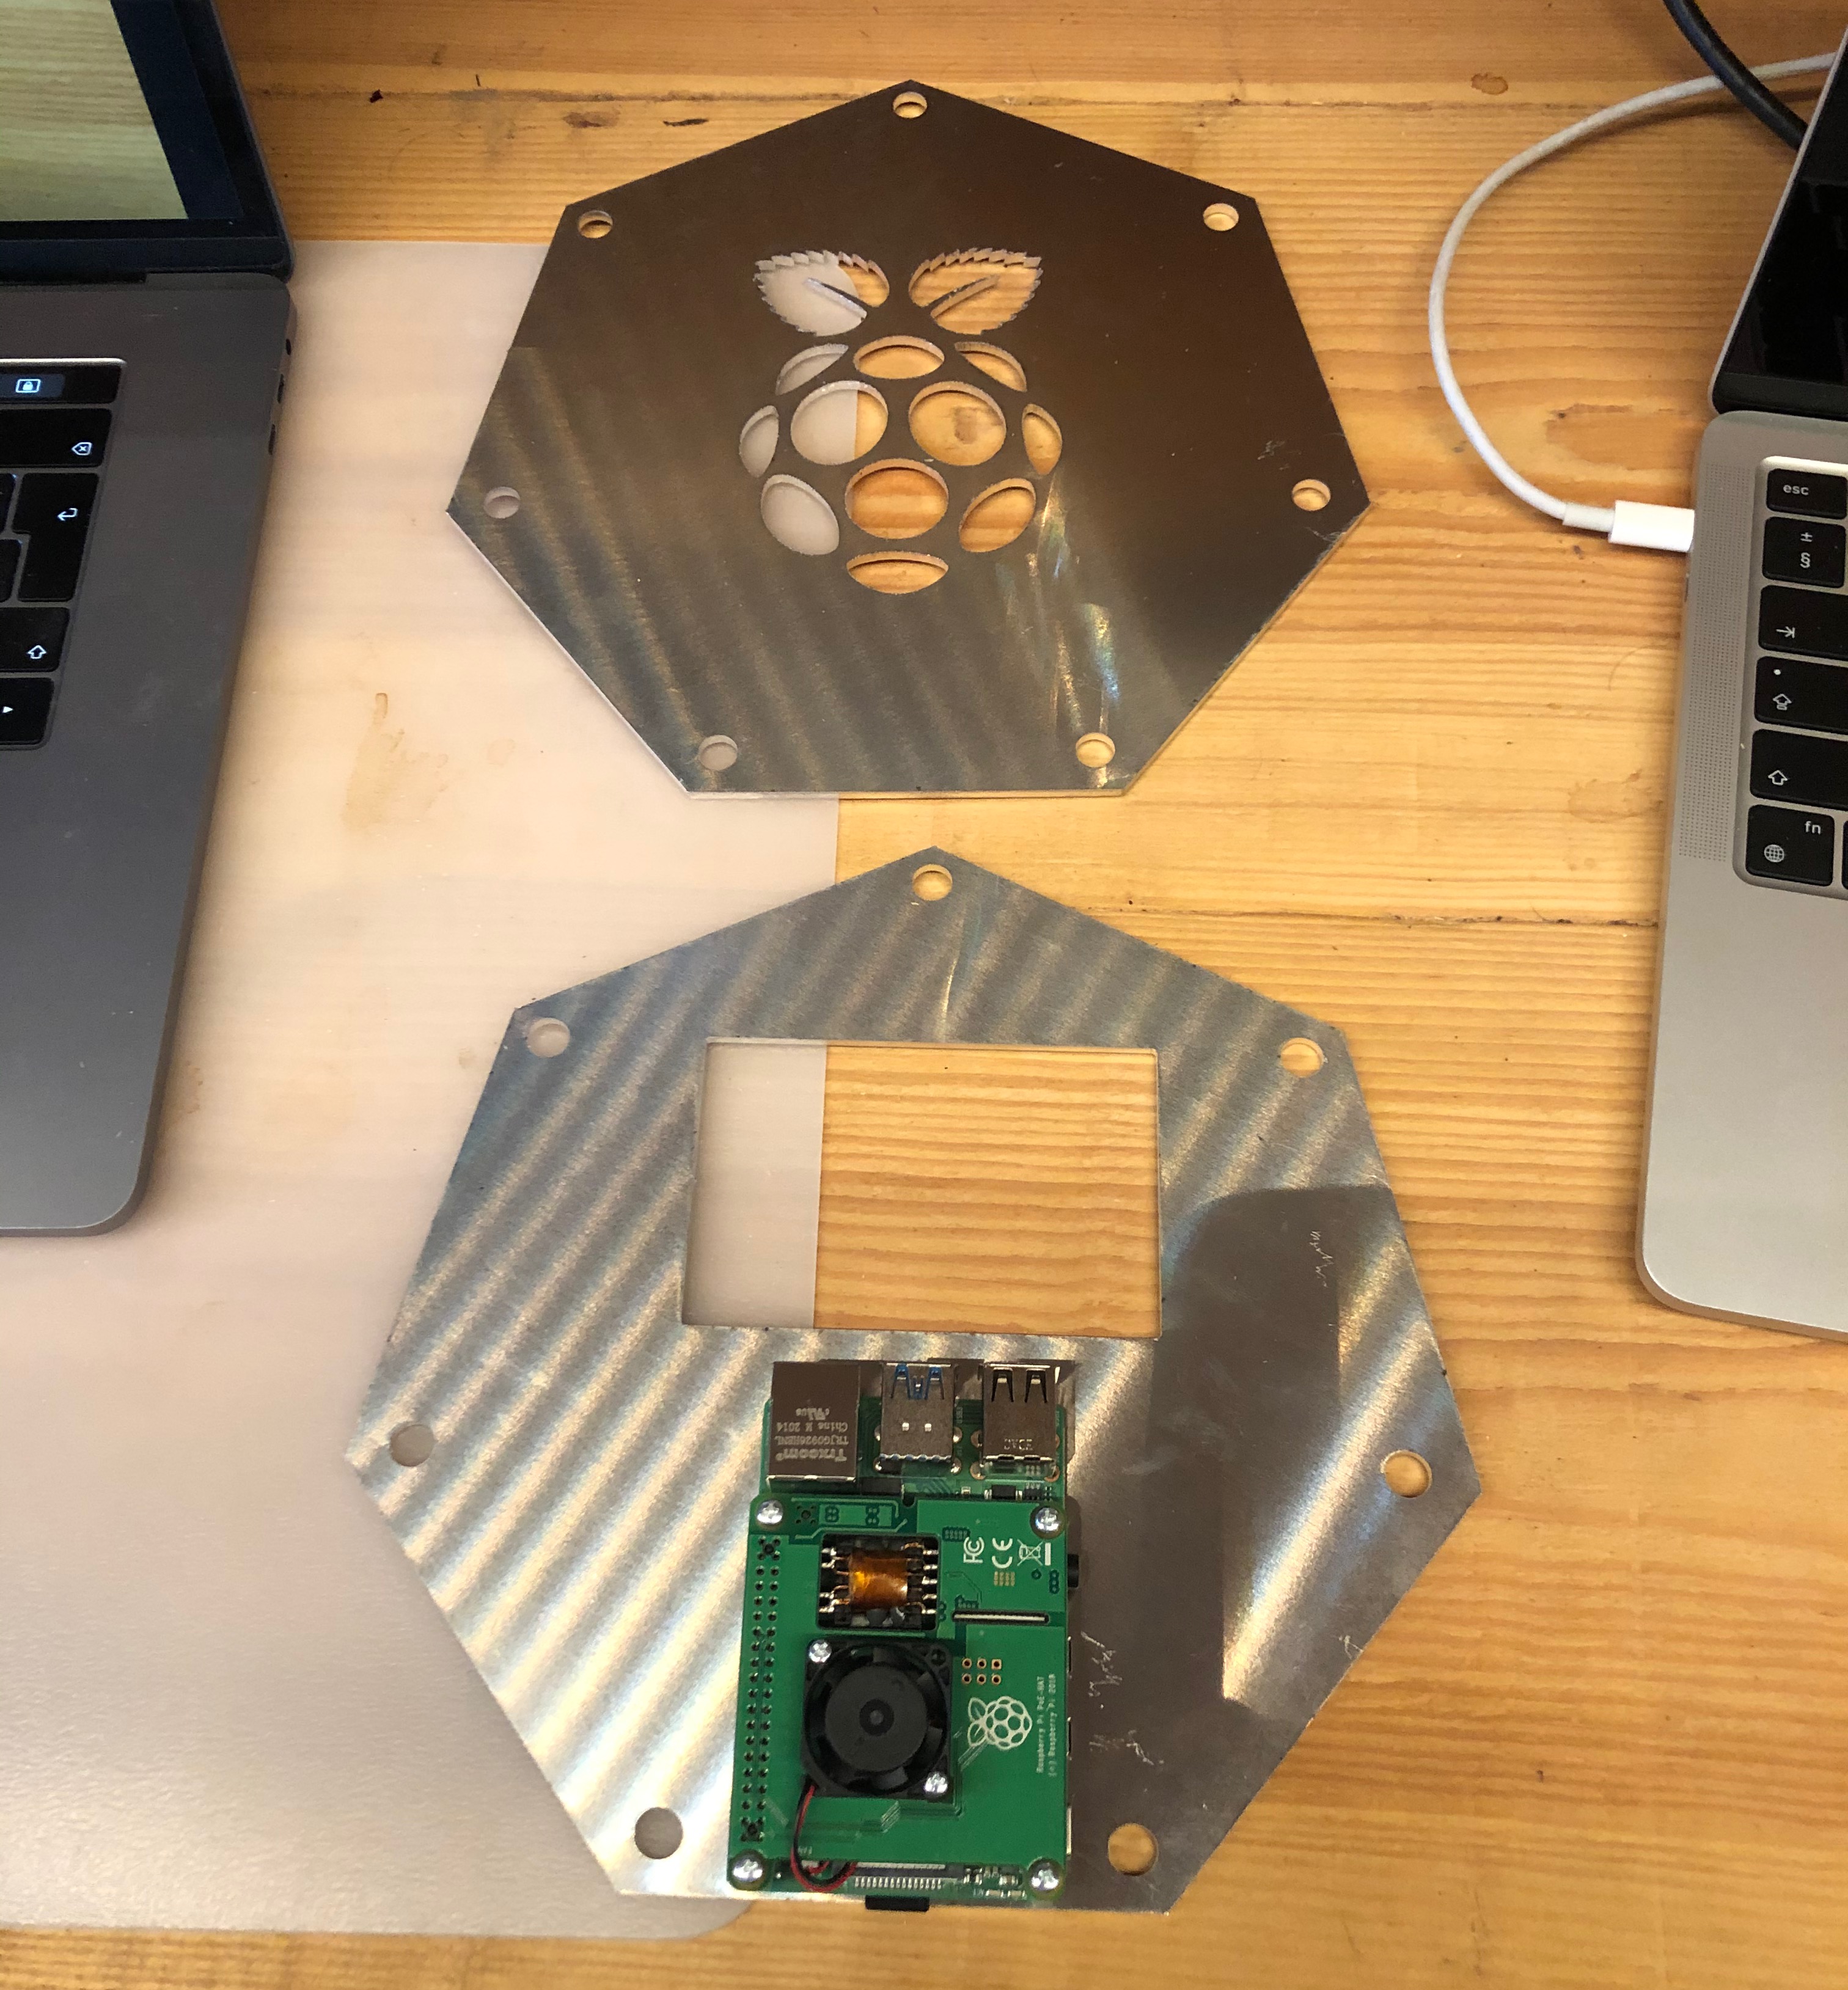
Towards goal of keeping cluster self contained I wanted to house the network switch and four Pi 4b in a rack. There are vaious off the shelf options for stacking Pi’s but I couldn’t find a great solution for my specific requirement. I’d not done a project using custom cut metal before and thought this would be a good opportunity to explore. I thought aluminium would be good to polish to a nice finish so I decided to use 3mm medium strength 5251 aluminium.
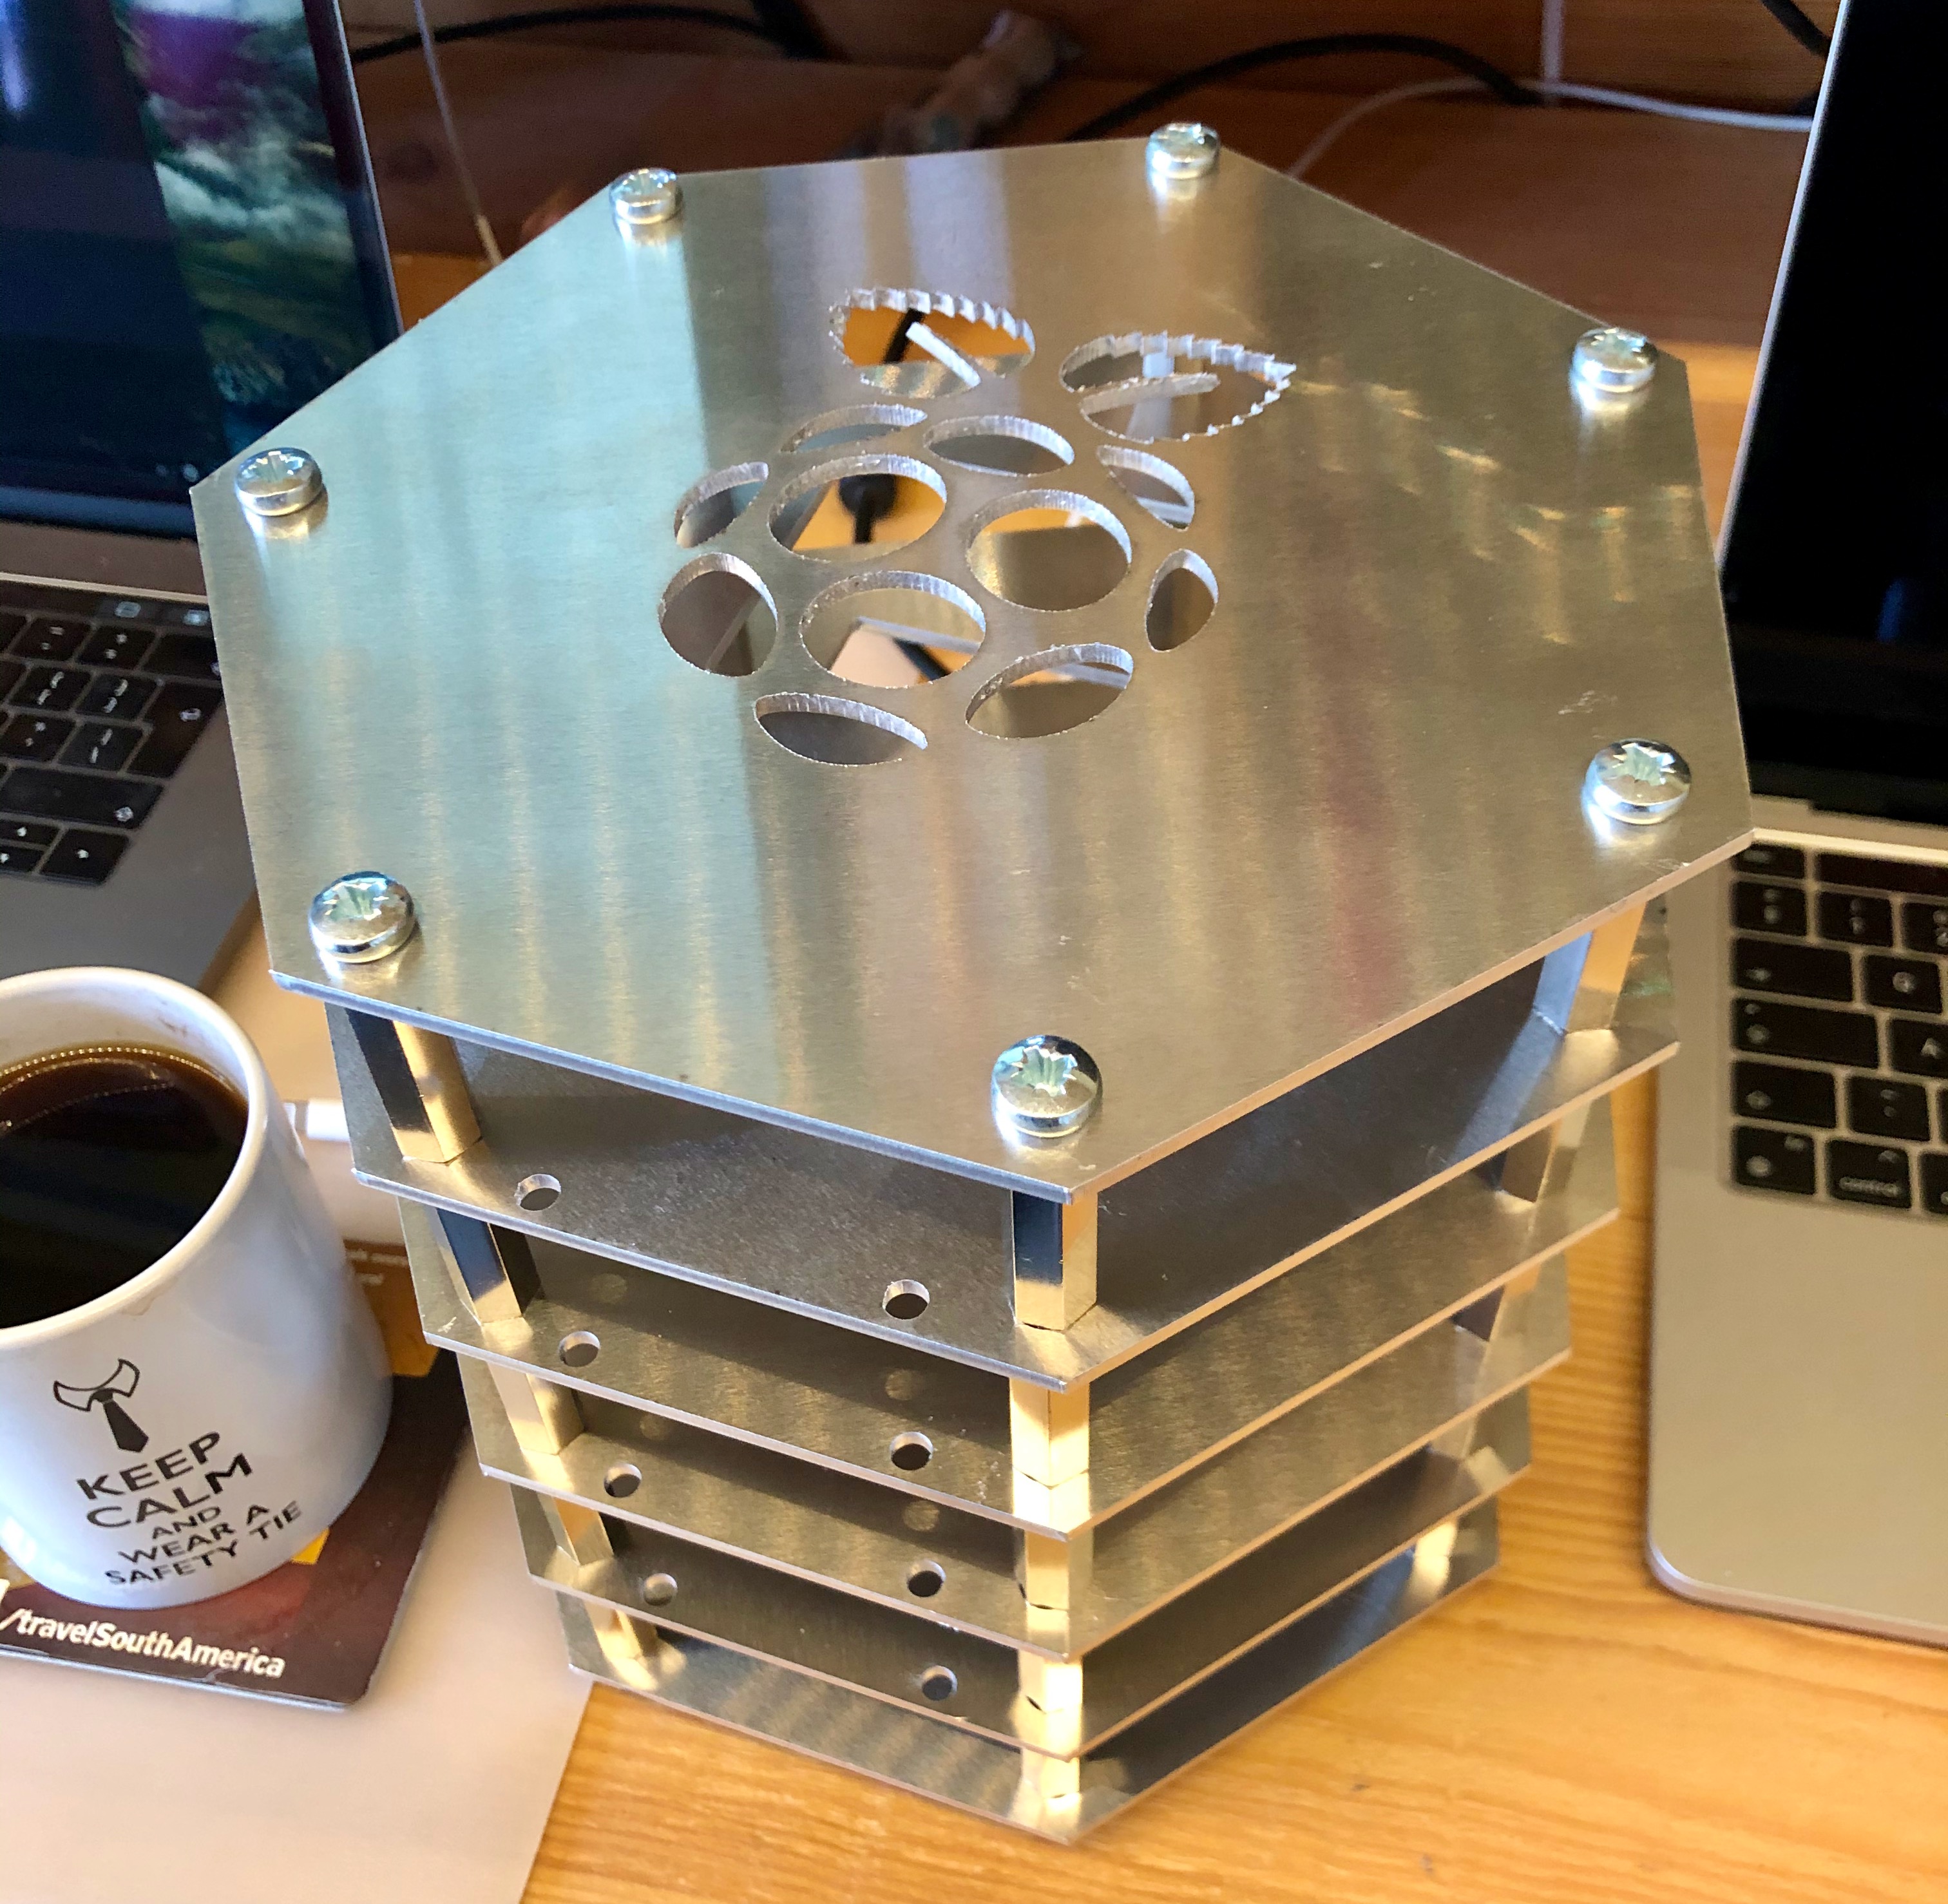
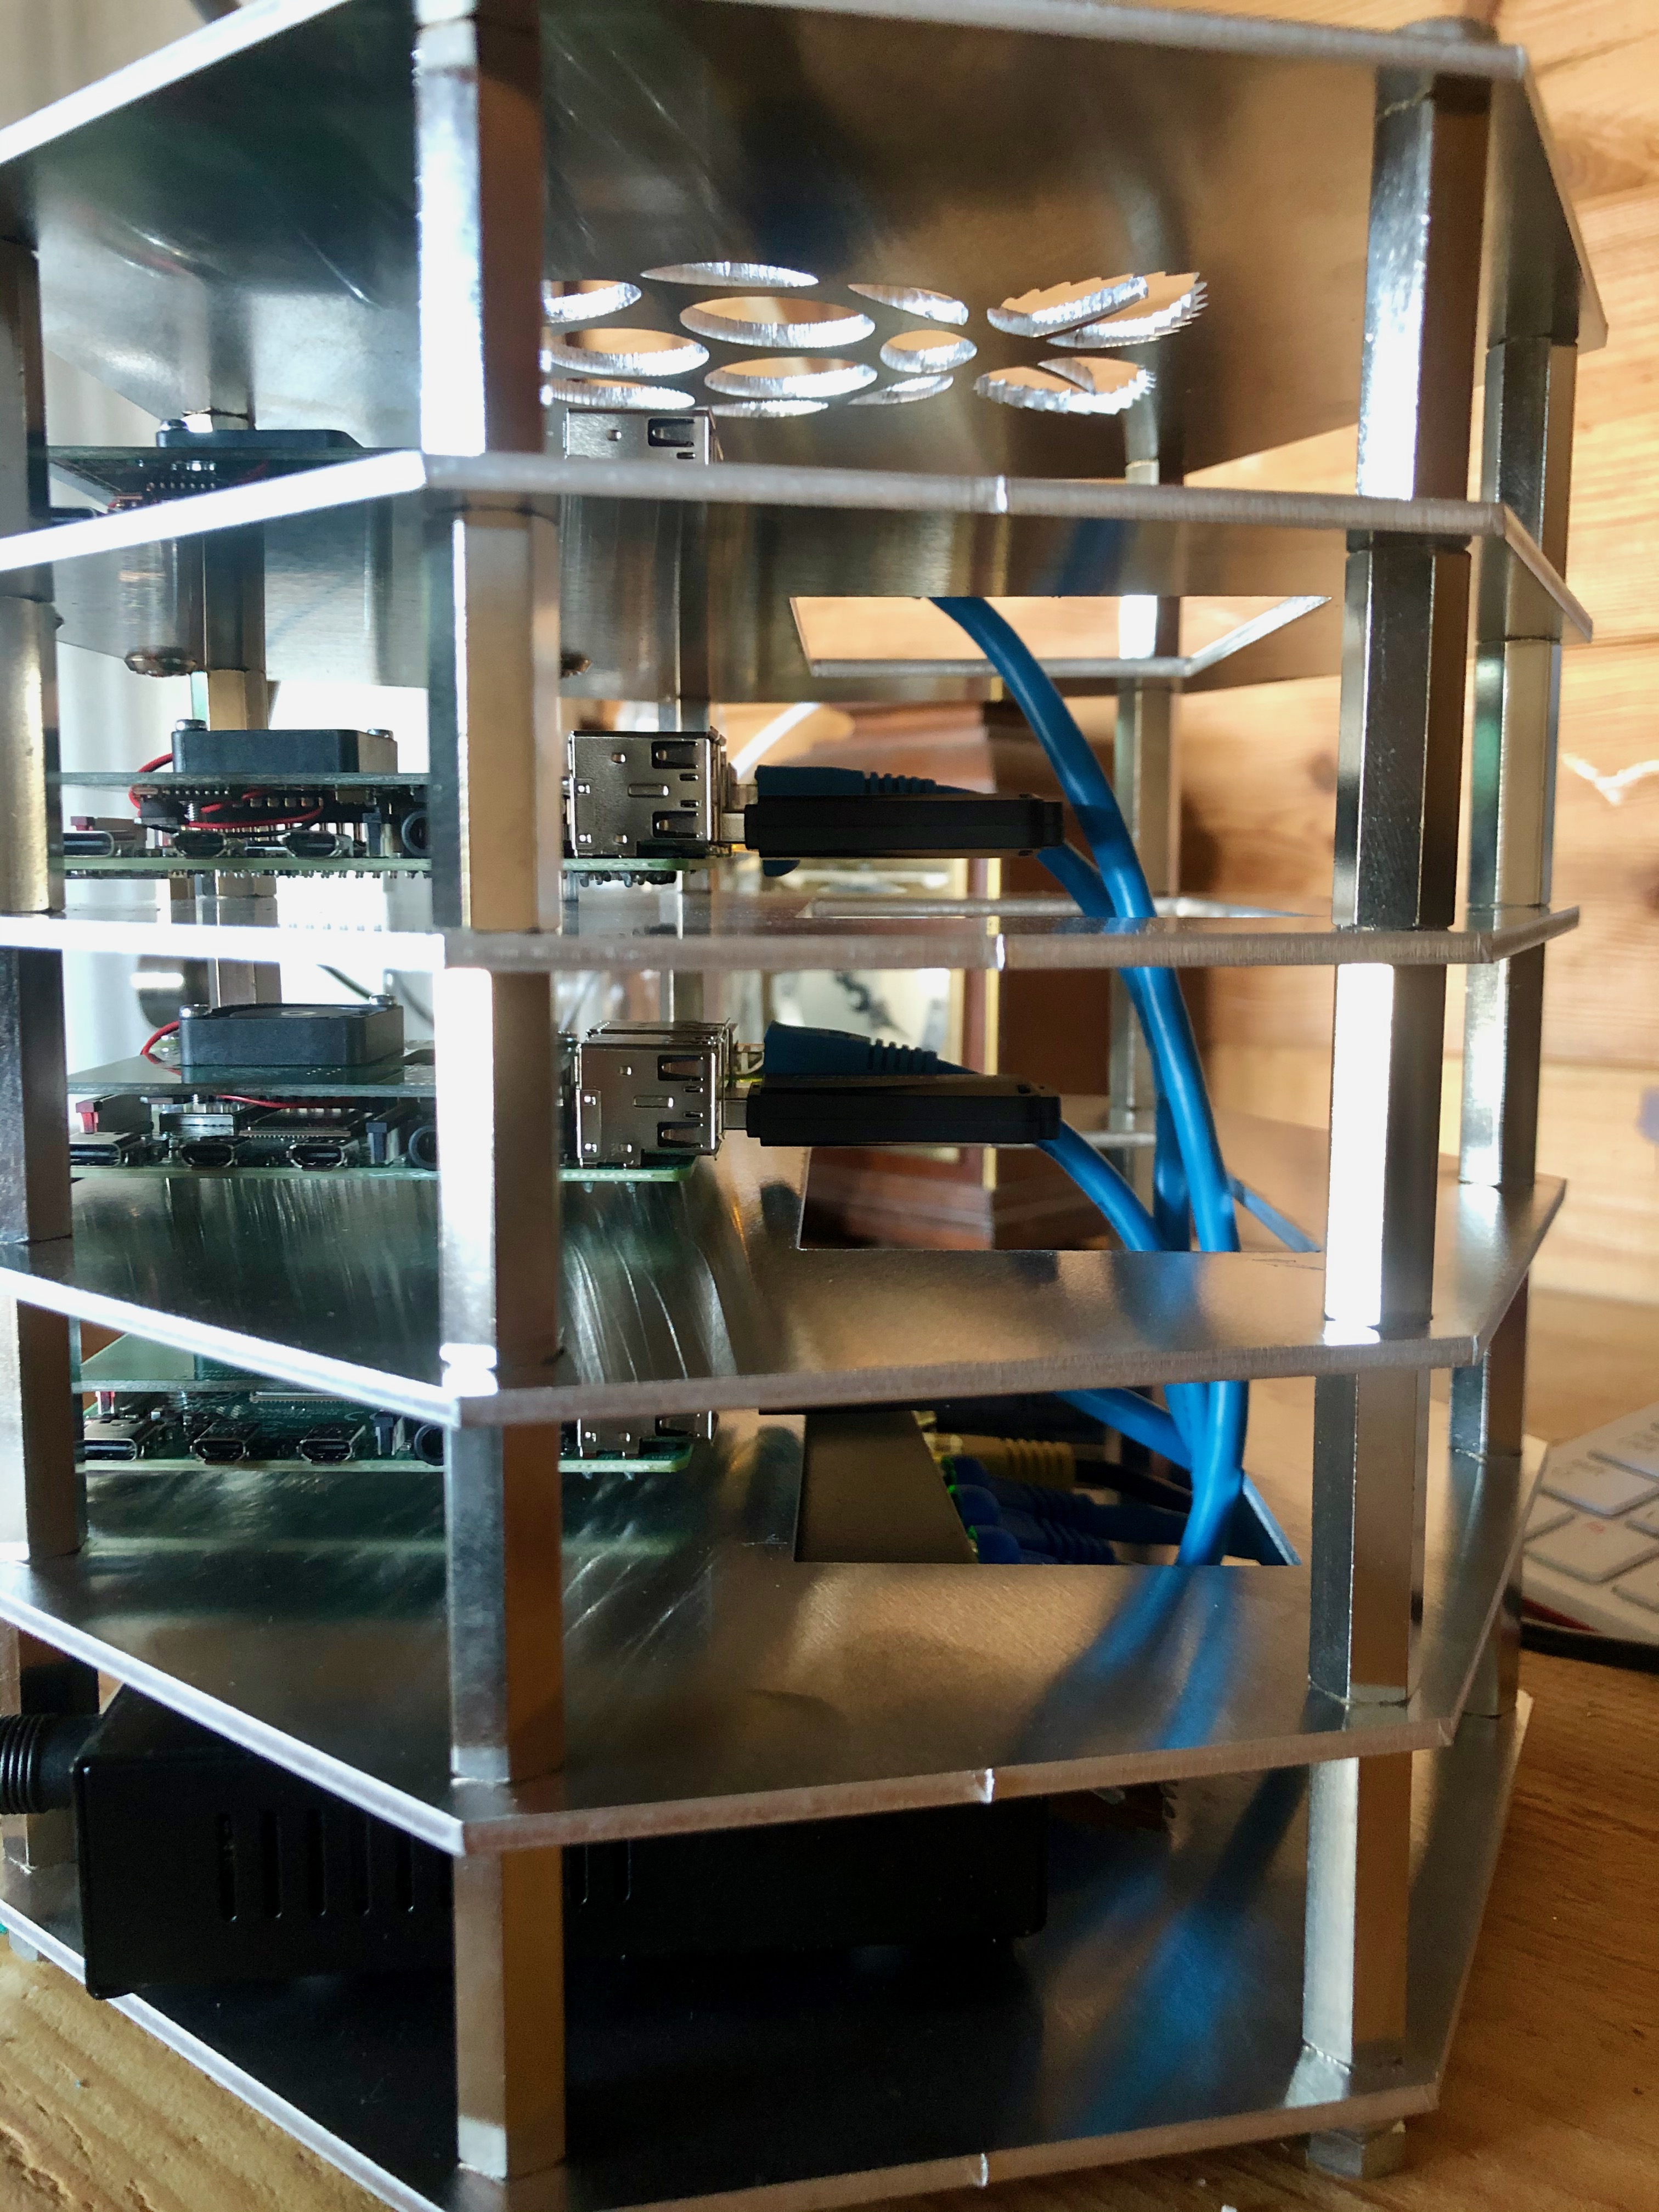
I found a UK based mail-order laser cutting provider Lasered. To make the order required drawing in either Drawing Interchange Format (DXF), AutoCAD (DWG) of Mastercam Numerical Control File (NC) format to create this I used open-source LibreCAD software. I’d not used CAD software before so there was a learning curve but this was not large and within few hours I’d created two drawings. The cluster will primarily be used as Kubernetes cluster so I designed all the plates shaped as heptagons, the top and base plates also have Raspberry Pi logo. For attaching plates together allowing enough space for airflow I chose 35mm standoffs with M4 thread to accept M4 I gave holes a 4.2mm radius. For mounting the Pi the board has 2.7mm holes to accept M2.5 thread screws so I mirror these on the plate with 2.7mm radius and use 5mm standoff to lift slightly. I added a rectangular hole behin Pi on each shelf to allow for internal PoE cable routing. The rack dimensions when assembled, widest points the heptagon is 210mm and (6x3mm=)18mm plates plus (5x40mm)=200 standoffs gives total height of 218mm.
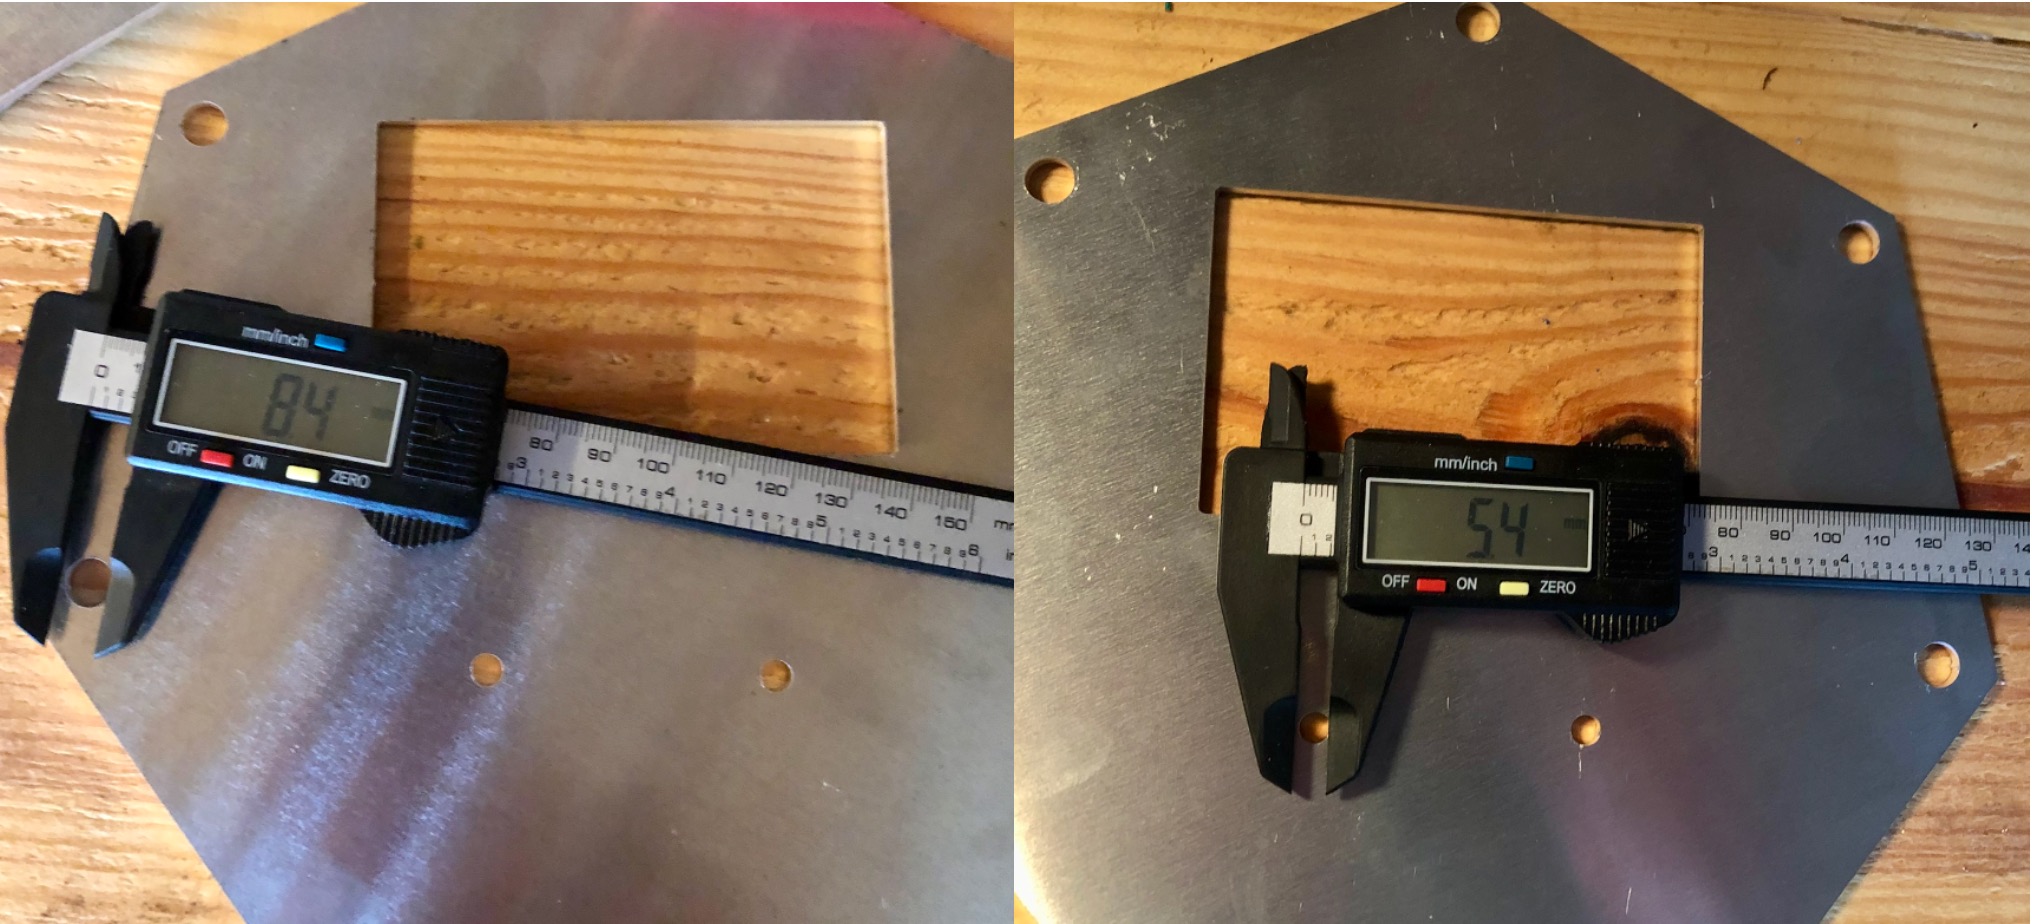
I got the plates cut and they looked better than expected except the standoff holes looked rather large. I checked the the calipers and noticed my planned 4.2mm holes were 8.4mm and my 2.7mm holes 5.4mm. Seems I had entered diameter as value for circle radius parameter. Luckily I hadn’t ordered the standoffs, nuts or bolts. It was easy to switched from M4 to M6 for the between layer standoffs but as the Pi board only accepts M2.5 I kept these and added a washer to prevent bolt going straight through the mount hole on the shelf.
Rack Cabling
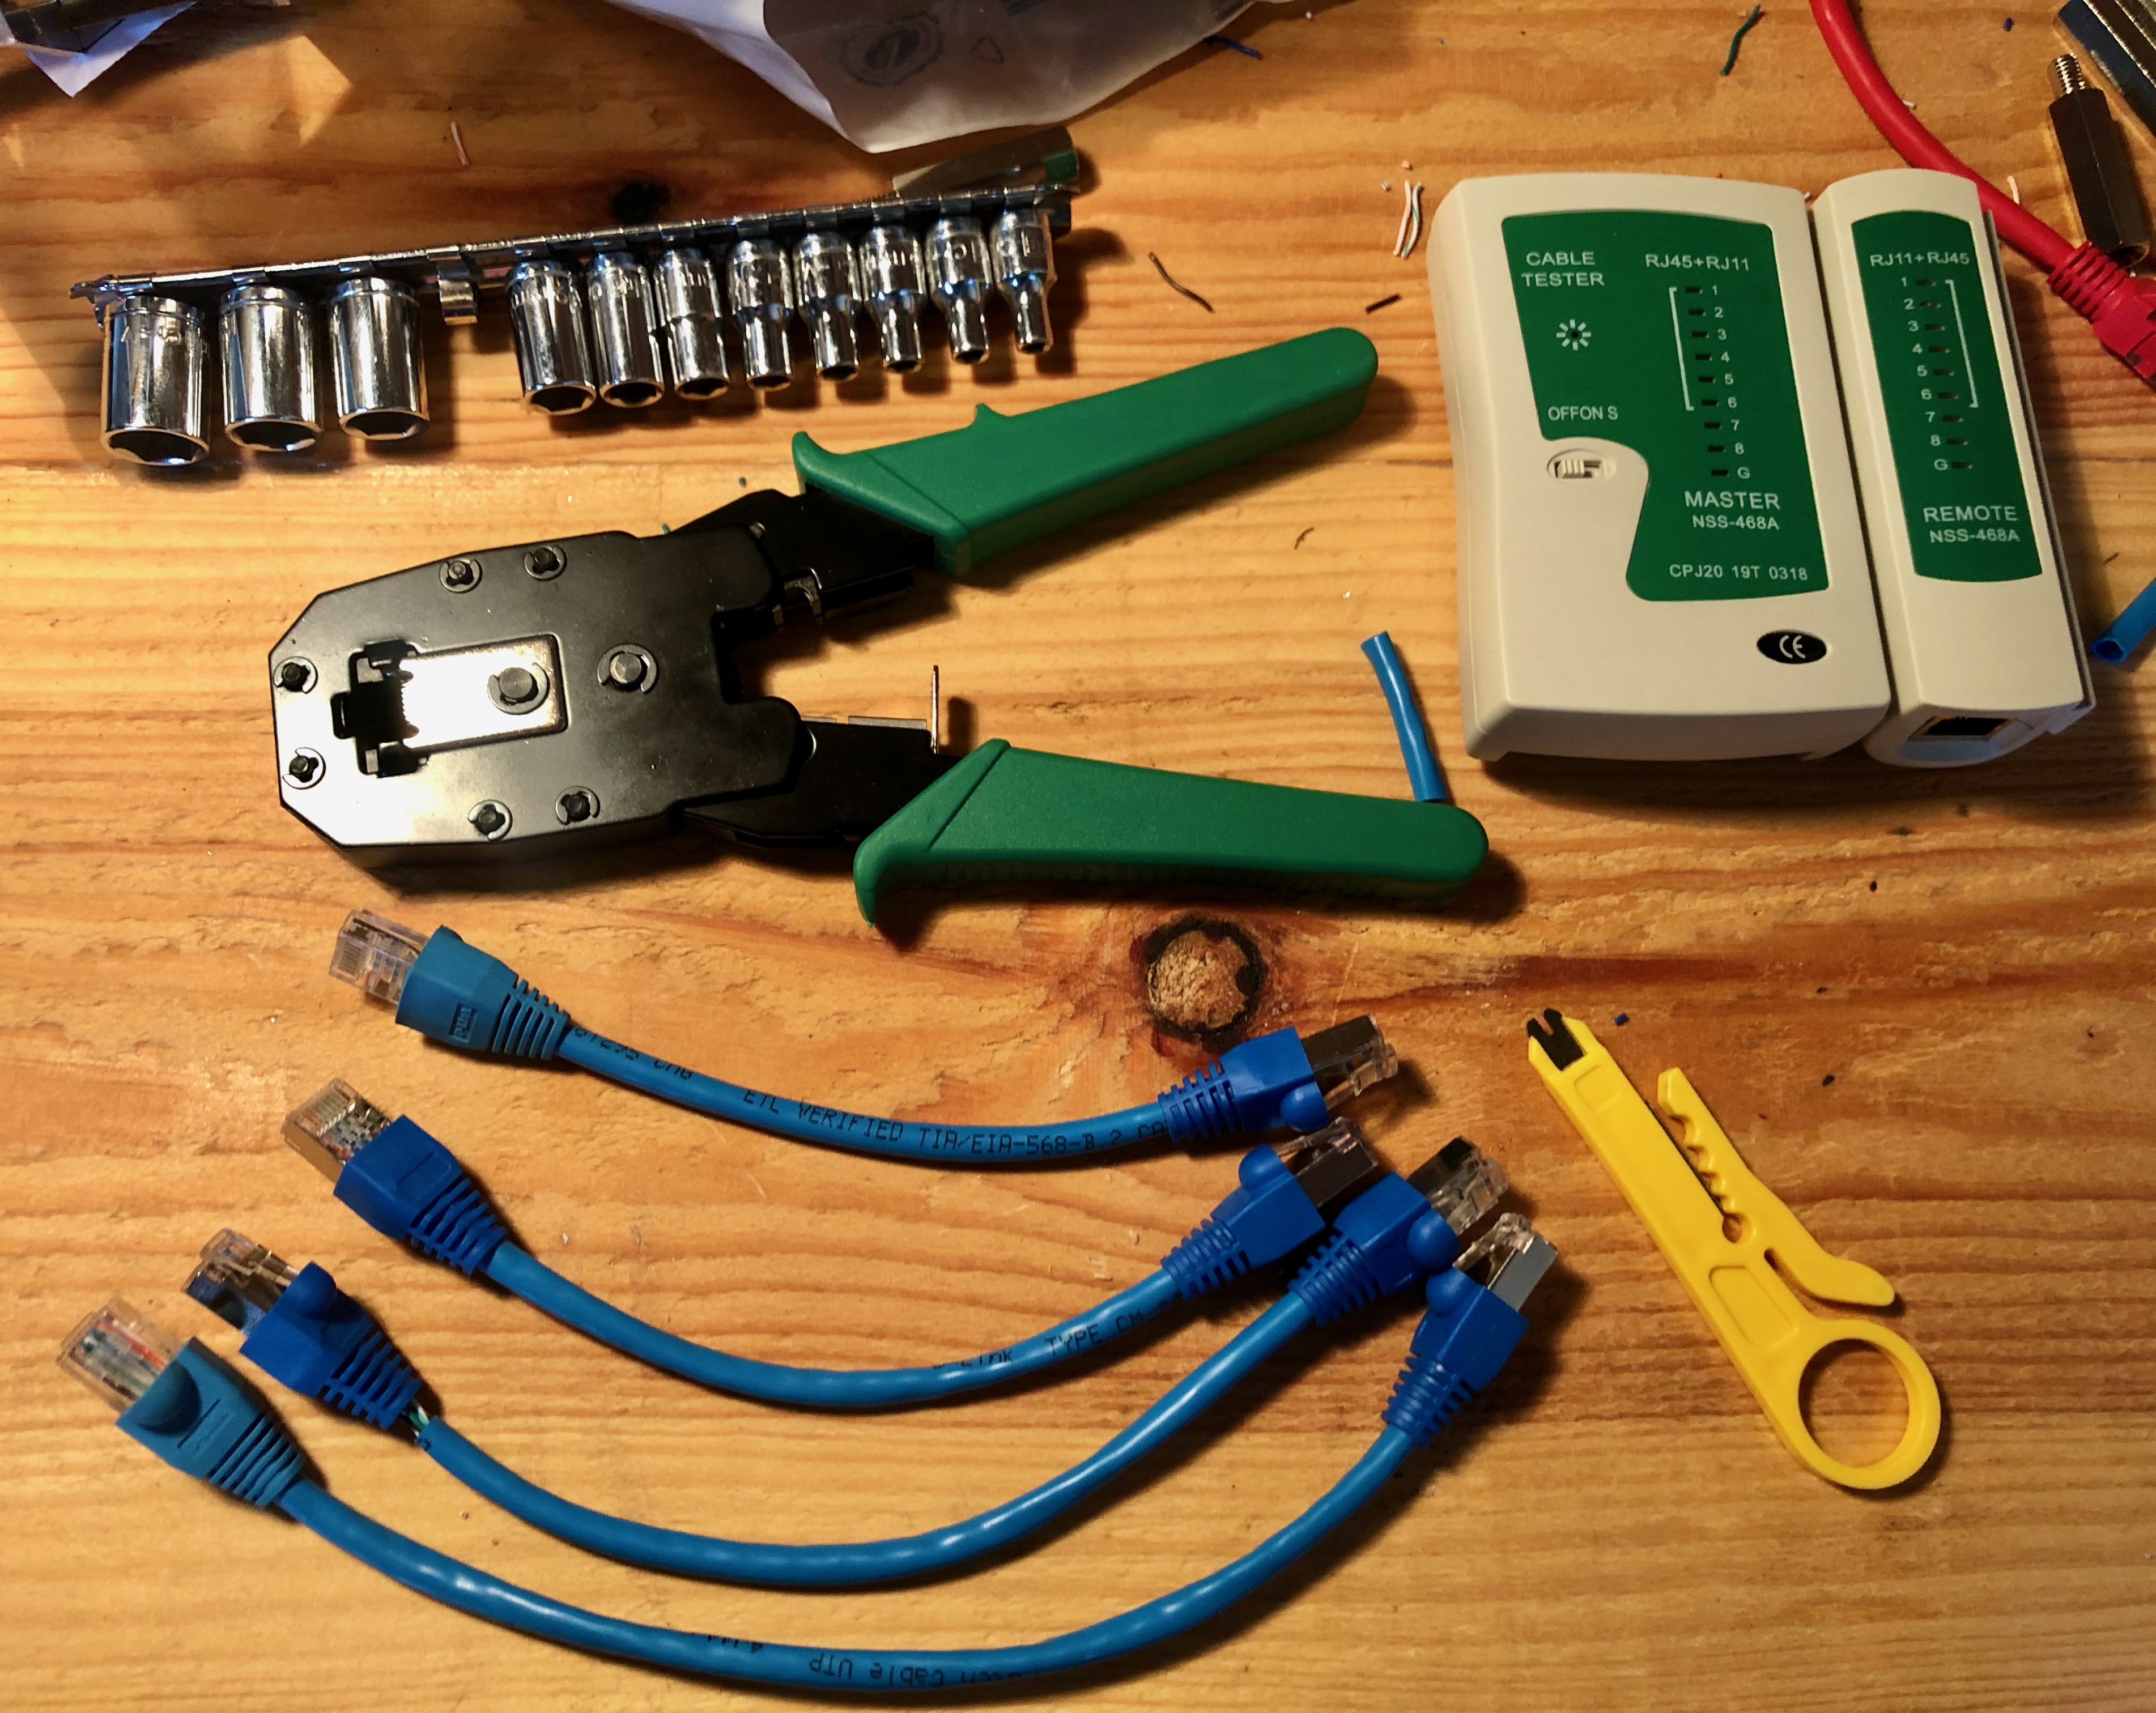
To keep the internal rack cabling tidy I decided to create each cable with custom length. The PoE standards require category 3 cable or better for 802.3af (upto 15watt) and category 5 cable for better for 802.3at (upto 30watt). The Raspberry Pi NIC can operate at 1Gb/s, category 5 is cable rated for 100Mb/s, category 5e is cable rated for 1Gb/s, category 6 is cable rated for 10Gb/s. To operate the Pi’s over PoE at full potential I use category 5e cable and crimped RJ45 connectors.
Finished Rack
Hardware Bill of materials
- 35mm M6 Standoffs (Bag 50) £30
- 10mm M6 screws (Bag 100) £6.45
- M6 hexagonal nuts (Bag 250) £6
- 5mm M2.5 Standoffs (Bag 20) £5
- 6mm M2.5 screws (Bag 100) £3.50
- Custom laser cut aluminium plates £60
- <1m Cat5e cable
- RJ45 cable crimping tool kit £20
Total rack parts cost ~£130
- 4x Raspberry Pi 4B WITH 8GB RAM (4X £73.50=) £294
- 4x Raspberry Pi PoE HAT (4x £18=) £72
- 4x 128GB SanDisk Extreme (4x £24=) £96
- 4x Arcanite 128GB USB 3.1 Flash Drive (4x £20=) £80
- Netgear GS305P £45
Total cluster parts cost ~£717